|
2010 Maintenance
Log
4/3/10 | 4/25/10 |
4/30/10 | 5/1/10 |
5/2/10 | 5/3/10 |
5/4/10 | 5/5/10 |
5/6/10 | 5/7/10 |
5/8/10
5/9/10 |
5/14/10
| 5/15/10
| 5/16/10 |
6/2/10 | 9/23/10 |
10/9/10 | 10/10/10
|
Saturday, April 3, 2010
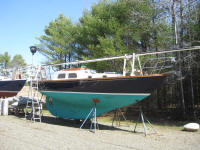
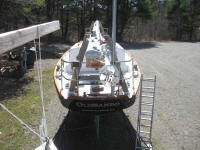
It was a beautiful, unseasonably summer-like day in what
had become an unusually early and pleasant spring after a
weird, warm-ish, and minimally snow-filled winter. I'd
had enough of the boatcover, so off it came.
I gave
the boat a quick powerwash to remove winter grime, but she
looked OK after her long hibernation. In the coming
weeks, I'd work on a short list of annual maintenance
chores, with no projects of particular significance planned. |
 |
Sunday, April
25, 2010
The month of April evaporated with hardly a
trace; I'd barely been aboard the boat since I uncovered her
three weeks ago, and here it was, nearly May. It was
time to start really thinking about getting some maintenance
work done.
At some point in the next week or two, I
hoped to get the boat indoors for varnish maintenance.
Time would tell how the scheduling would work out.
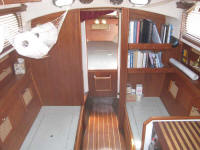
With another beautiful spring day at hand, I spent the
morning cleaning the inside of the boat, particularly all
the lockers. For the first time, mice had made a nest
in the boat. I'd discovered last December that some
spare rolls of paper towels had been chewed, but at that
time I'd not discovered where the bits and pieces had gone.
Without signs of an ongoing infestation, I didn't worry much
more about it.
The other day, looking for something
in one of the lockers beneath the V-berth, I discovered the
nest: a pile of shredded paper towel, but fortunately
little else, though I'd noticed in December that there were
a couple holes in the caning on one of the starboard locker
doors.
I found no other particular damage now,
though, except for some plastic bags with their corners
chewed off. So I dragged the vacuum up on the boat and
cleaned up the mess, and then removed and reorganized
everything from these lockers, as well as all the other
lockers on the boat. While each locker was empty (most
were already empty, as I'd removed most stuff from the boat
in the fall), I washed the inside of the locker to remove
dirt and such (minimal) and to freshen each space.
As
part of my ongoing effort to reduce the volume of stuff
aboard, I removed a few items from the V-berth lockers that
I deemed unnecessary (I couldn't believe how many spare fuel
filters I had on board, both 2 and 10 micron: about
six of each. I decided three of each was more than
adequate for any filtering emergency), and consolidated my
engine spare parts boxes. I'm not a packrat or
hoarding sort, but I do have a thing about being prepared
for the unexpected when on the water, so my spares inventory
would never be called sparse.
I sorted out various
unneeded bits of line and hardware from one of the saloon
lockers (why did I have a pair of double cheek blocks on
board? Why did I even buy them in the first place, I
wondered?) and cleaned them. Since the beginning, I've
used pieces of that plastic carpet protector--the stuff with
the little nubs on the bottom side--to line all the lockers
on the boat; the nubs hold the plastic off the hull, and
provide an air space. I've had great luck with it.
IN any event, I pulled this stuff out of each locker and
cleaned both sides (just a little residual dusty-type dirt)
and the hull beneath before replacing the plastic liners.
Most of the usual gear was in storage boxes up at the house,
which I'd go through later before replacing it on board.
I thought I'd do this during cold winter evenings, but of
course I barely looked at the boxes once I'd stuck them in
the basement.
There were a number of hardcover books
in the shelves that had lived aboard for a few years, but
which I decided need not remain. Removing them would
allow more space for books that we'd actually read aboard
this year.
Last year, the fresh water tank became
anything but: the water picked up a nasty taste and
odor that made it unusable for anything but washing; I
couldn't even make coffee or cook with it. Now, the
water out of the old tank was never particularly delicious,
and we never drink the water, but in all the past years I'd
never had issues with it tasting through the strong coffee I
make, or when using it to cook.
In the fall, at
winterizing time, I'd sprayed out the tank with fresh water,
dislodging some suspect deposits. But I wanted to do
more, so now I filled the tank full with a mixture of
bleach and water and left it to soak for a a few days and
kill off whatever might be in there. I pumped some of
the mixture through the lines as well to allow it to soak
the insides of the supply lines. Later, I'd drain all
the bleach water and rinse the tank and lines thoroughly
with a few flushes of pure water. |
 |
Friday, April
30, 2010
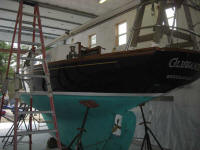
Taking advantage of a brief upcoming break
over the weekend between projects at work--meaning that shop
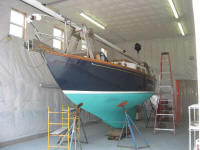
space would be available for a few days--I moved
Glissando indoors for some annual varnish maintenance.
Before doing so, however, I drained the water tank of
its bleach/water solution, then filled and drained it three
times with fresh water to rinse out the remains of the
bleach and refresh the tank. |
 |
Saturday, May 1,
2010
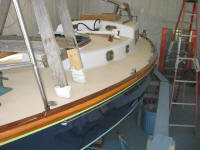
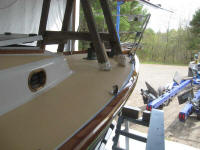
After setting up some staging, I got to work on
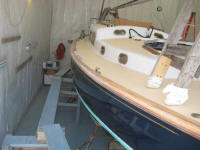
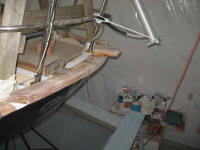
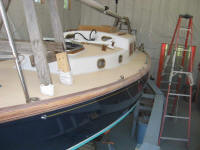
the brightwork, beginning with the toerails. The
toerails were in generally good shape, though there always
seemed to be places where water got beneath the varnish,
usually at the lower edge next to the deck, which I never
got sealed the way I really wanted to. But a
discussion of all that is wrong with my toerail construction
is a topic for another day.
Sometime soon, I'd need
to strip the toerails and completely refinish them.
For now I was not going that route. I
scraped away the few loose areas of varnish, then thoroughly
sanded the toerails with 220 grit paper. I also sanded
the sea hood, companionway trim, and handrails to prepare
them for their own maintenance coats of varnish. |
 |
While I was at it, I
cleaned up the bronze ports, which were still in quite good
condition from last year's annual maintenance: no
failures of the lacquer, and minimal staining. This
meant that cleaning them up was a quick matter of lightly
sanding with 220 grit paper to prepare them for new coats of
clear lacquer, which I'd do in the near future.
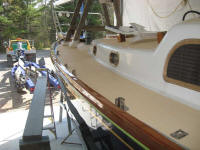
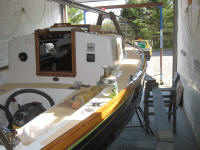
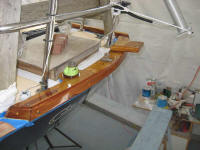
After
cleaning up the sanding dust and so forth, I prepared the
toerails for varnish my masking off the decks and rubrail.
Because I've had issues in recent years with my normal tape
sticking badly to the well-worn Awl-Grip in the boat's
channels, I chose to use a low-tack, delicate-surface
masking tape on these areas (the blue). For now, I
only masked the toerails, as they needed the most coats, and
I didn't have time to do the other areas I'd prepped right
then.
Finally, I applied a coat of varnish to
the toerails. |
 |
Sunday,
May 2, 2010
I began the day with my favorite folly:
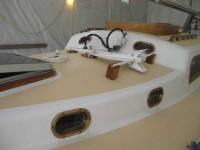
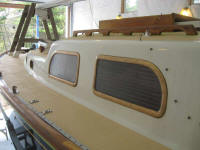
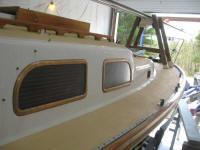
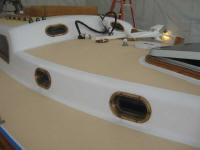
refinishing the port frames. Actually, maintaining the
frames would be easy but for the laborious masking required
in order to spray the clear lacquer. I complain about
this each year, though less because I don't like it (even
though I don't like it) but more in order to pass the word
to anyone out there that attempting to maintain a bright
finish on bronze ports in this way is a ridiculous idea that
I'd wish upon no one, and which idea should be immediately
abandoned.
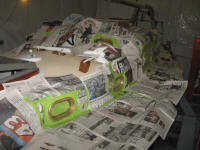
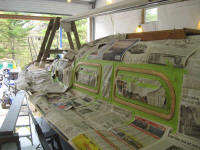
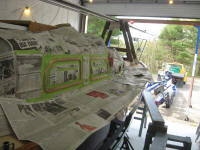
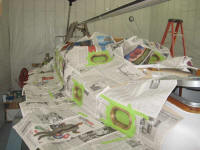
In any event, I spent the better part of
two hours masking all the port frames inside and out, and
covering surrounding areas with old newspaper to protect
against overspray. Then, after solvent-washing the
frames (which I'd sanded yesterday), I applied several coats
of spray clear lacquer, satin finish--4 or 5 coats, I don't
remember.
Once the lacquering was complete, I removed
all the tape and newspaper, taking about 2 minutes to undo
two hours' worth of work. |
 |
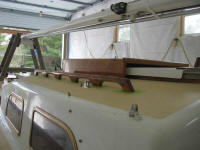
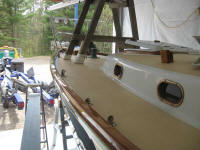
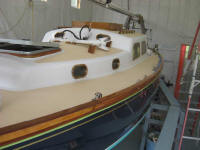
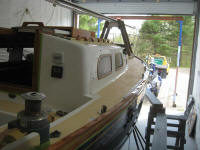
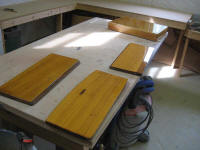
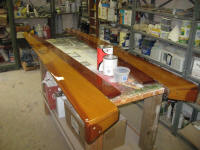
In between coats, I
prepared a few more brightwork bits for their varnish
maintenance: specifically the cockpit coamings,
lazarette hatch, and swashboards. All were in good
condition and would require only the usual 1-2 maintenance
coats.
Once the ports' lacquering was complete,
I masked off some of the brightwork on deck that I'd sanded
yesterday, but not yet varnished: sea hood,
companionway trim, and handrails. I sanded the fresh
coat of varnish on the toerails, then vacuumed and
solvent-washed. Finally, I tacked off and applied a
coat of varnish to everything. |
 |
Monday,
May 3, 2010
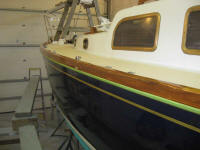
In between other projects at the shop, I
sanded and revarnished the toerails. |
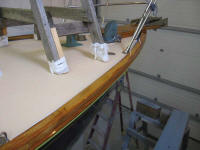
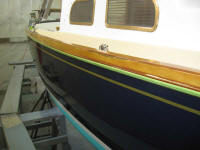 |
Tuesday, May 4, 2010
Last year, I was forced to
succumb to the dark side: the white Awl-Grip on deck
had reached a point where simple cleaning with mild soap
wasn't good enough to improve its appearance. The
problem first manifested itself when, at that time, I found
that sanding dust from my annual ports maintenance seemed to
have stained the paint and wouldn't come away with soap or
solvent.
So, last year began the cycle of minor
polishing for these white-painted areas, the first step in
an inexorable path to eventual repainting.
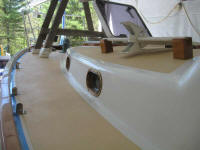
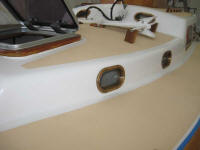
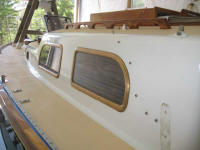
Thus, I was forced to continue the cycle this year. A
quick hand-polish with 3M Finesse-It finishing
material, followed by a protective layer of Awl-Care polymer
sealant, returned the cabin trunk areas to an appearance I
could accept.
I didn't have time for a coat of
varnish on this day, though I sanded and cleaned the
toerails in preparation. |
Before Treatment
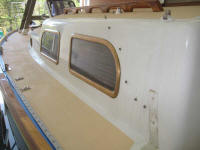
After Treatment
 |
Wednesday, May 5, 2010
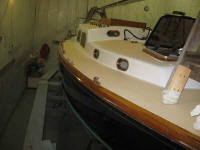
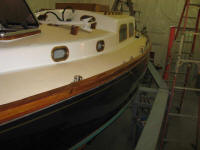
To ensure I got the fourth
coat of varnish on the toerails, I began my work day by
applying the varnish, knowing I'd be working outdoors on
other boats for the remainder of the day.
This coat
came out well, and I deemed the toerail varnish maintenance
complete, with four new coats. |
 |
Thursday, May 6, 2010
I worked on a few odds and ends
during some spare moments of the day. I had noticed
that my Strong Track on the mast had pulled out the screw
that holds it in place at the bottom, so I retapped for the
next size screw and installed it.
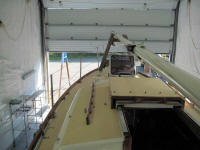
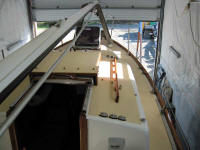
I installed the
stanchions and lifelines, now that the toerail varnishing
was complete. |
 |
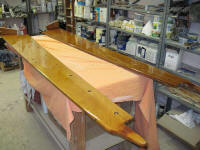
I sanded and varnished the
second side of the cockpit coamings: |
 |
For a while, I'd been
considering removing my mainsheet traveler. This
had become a frequent topic of discussion on board during
sailing days in the past year or two. Simply put:
I almost never used the traveler, and when I did, it was
more out of some sense of obligation than anything else.
That in and of itself wouldn't be enough reason to
remove it, but having the traveler where it was, and not
being used, impinged on a prime seating area in the cockpit:
the aft deck. Sailing offwind on an idyllic summer
day, I often like to sit on the poop deck, where I can face
directly forward, steer with the tiller extension, and have
better views. Having the traveler there was something
I could work around, but if I wasn't ever using the
traveler, why should I have to sit across the 2" tall
device?
Over the years, I found that I could tweak
the sail shape satisfactorily with the rigid boom vang,
which reduced the utility of the traveler. Plus, I was
just too lazy to mess with it during tacks, for the limited
improvement its repositioning ever made on this
hardly-stellar-upwind-to-begin-with boat. In the end,
comfort won out over the two times per year that I might
grudgingly play with the traveler.
Still, I never
considered its removal to be a job of prime import, and I
doubted I'd get to it this year. So I was as
surprised as anyone, on this particular afternoon, to
discover that I was ready to tackle the project immediately.
One never knows how the mind will work. |
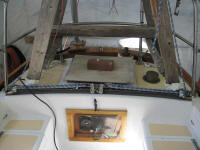 |
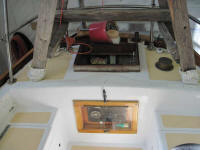
Removal was pretty
straightforward. 10 years ago, I installed the
traveler with 1/4-20 bolts and polysulfide sealant. I
was able to remove the bolts with relative ease, after which
it took a bit of careful prying to break the hold of
the sealant. Once started, though, the remainder of
the traveler released easily. I scraped away the cured
sealant and washed the area with solvent to remove the
residue. |
 |
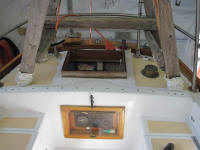
Next, I used a large
countersink to bore out the tops of the fastener holes, and
lightly sanded the top area of the little raised platform
where the traveler had been. |
 |
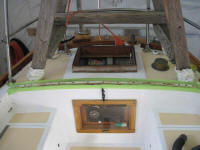
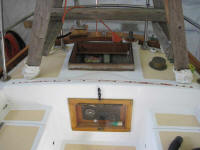
I masked off the area, and
filled the overbored holes with a fairing/filling mix of
epoxy, microballoons, and cabosil, intentionally leaving a
bit of the material in between the screw holes by using the
tape as a sort of screed guide. I thought
this would make eventual sanding and fairing easier for
reasons that made sense to me, but which I can't express on
this page. I pulled off the tape, and left the epoxy
to cure overnight. I'd need a second coat tomorrow. |
 |
Friday,
May 7, 2010
First thing, I water-washed the epoxy
fill, then sanded with 120 grit paper on a sanding block.
After cleaning up, I applied a second coat of filler, this
time a fine Alexseal fairing filler. Again, I masked
off the area and filled between the tape with the filler,
which I found made it easier to sand the filled holes
smoothly with the adjacent areas. |
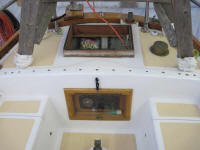
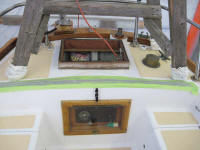
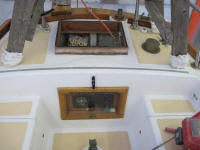 |
Because the Alexseal filler
historically requires at least 24 hours' cure time, I placed
some heat lamps over the repair for the balance of the day
to ensure that it'd be fully cured by the morning, when I
wanted to continue the repair process. |
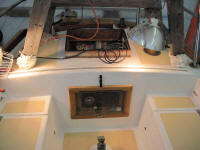 |
Saturday, May 8, 2010
I continued the traveler repair
process. First, I sanded yesterday's fine filler with
120 grit paper to remove most of the excess, then
finished up with 220; I also sanded the entire top surface
of the molded platform on which the traveler had been
installed, since my paint patching process would involve
respraying the entire top surface, as far as the radiused
corners. |
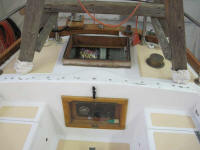 |
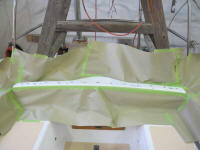
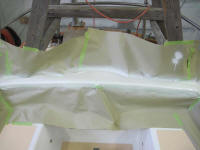
After completing a few
other odd jobs on board, including installing the batteries,
I masked off the area to be sprayed, solvent-washed and
tacked off, and then, over the course of a couple hours,
applied four coats of Alexseal white finish primer using a
disposable Preval sprayer. |
 |
Sunday,
May 9, 2010
It was a good day to take care of most of
the engine pre-season maintenance. I began with
changing the fuel filters: two primarys, a 30 micron and a 2
micron cartridge. I didn't change the engine-mounted
secondary filter based on the condition of the primary
filters. Changing the filter cartridges was
straightforward enough, though the 30-micron version
continued to baffle me with its inability to drain the
filter bowl through the supplied petcock; this time I didn't
even try, being fully prepared for this eventuality.
Over the years, I'd tried everything I could think of to
make this drain work--certainly there seemed to be no reason
why it wouldn't work--but I couldn't. Some
things defy logic.
In any event, I changed the
cartridges and laboriously refilled the filters with fuel
with their supplied plunger pumps. Maybe I was just
getting older and crankier, but this process seemed to take
much longer than I remembered. I could have poured
clean fuel into the filter from the top before installation
to make the process quicker, but that makes things messier,
and besides, I didn't remember it being so time consuming to
pump the fuel into the pair of filters. I might revamp
my fuel system next year with a new, single turbine filter
and a primer bulb. |
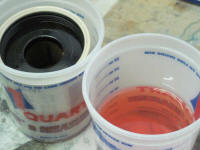
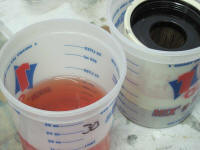
Left:
Old 2-micron filter and the fuel that came out of it |
Right: Old 30-micron filter and the fuel that came out
of it
 |
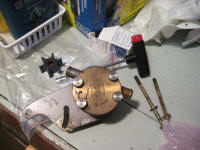
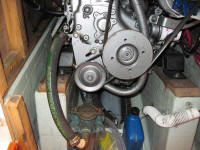
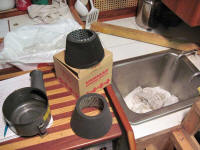
Afterwards, I reassembled
the raw water pump with a new nitrile impeller, and
installed a new air filter--the first one in many years, and
it probably wasn't critical to do it now. I needed to
change the oil and filter, since I hadn't done it in the
fall (my oil-sucking device failed), but that would wait
till the boat was back outdoors. |
 |
To wrap up the day, I
sanded smooth yesterday's primer on the traveler platform,
cleaned up, solvent-washed and tacked, and applied
three coats of Alexseal snow white with my little sprayer. |
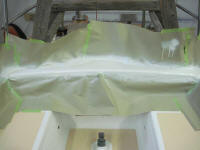 |
In the morning, I removed
the tape and paper. I'd purposefully left the seam
between new paint and old right at the radius of the raised
traveler platform for easier blending between old and new.
In another day or so, I'd work to fair and blend the hard,
taped paint line between old and new. |
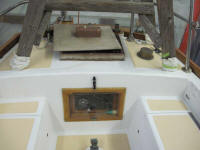
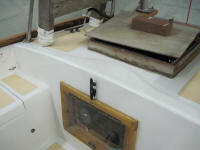
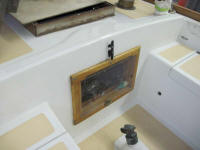 |
Friday,
May 14, 2010
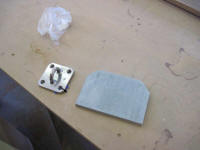
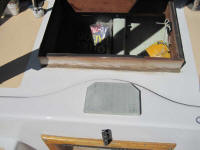
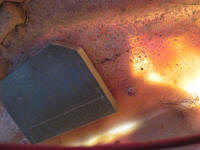
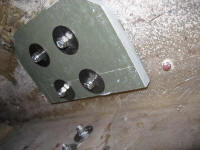
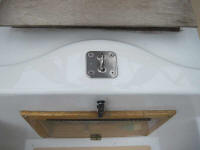
Yesterday afternoon, I took a few
moments to make up and tack in place a backing plate for the
new mainsheet padeye. I made the plate from 1/2" thick
fiberglass and secured it beneath the desired location with
hot glue and epoxy adhesive. |
 |
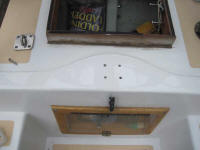
With the plate thusly
pre-installed, I could drill and tap for the fasteners to
secure the stainless steel padeye, completing the project. |
 |
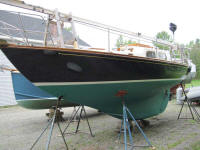
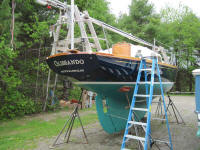
Continuing to knock small
projects off my list and get the boat ready for launching by
the end of the weekend, I painted the bottom. |
 |
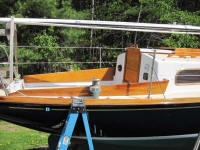
I installed the cockpit
coamings. |
 |
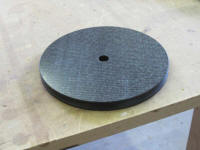
Over the winter, I'd had a
new Delrin sheave made up to replace the original Bakelite
masthead sheave for the main halyard. It was a simple
matter to install it. |
 |
Saturday, May 15, 2010
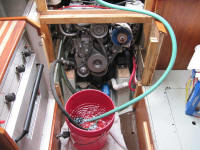
I love my
engine. After setting up my bucket and hose, and
checking everything over, I could barely get my hand on the
key before the engine had started; she was very enthusiastic
to fire. But again, the raw water impeller wouldn't
pull water out of the bucket on its own and didn't seem to
self-prime, an occurrence that I'd been noticing for the
past couple years when running the engine on the hard.
I had to shut down and prime the pump, after which it worked
fine. |
 |
I ran the engine for
several minutes--15 or 20--to warm the oil for changing.
At one point, throttling up for a bit, the engine hesitated
a bit, a sign of air in the fuel system--air left over from
last weekend's filter change. The engine didn't die,
and eventually worked the air through on its own.
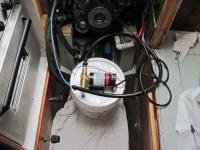
After shutting down, I changed the oil and filter. I
used a new motorized pumping system. Years ago, I'd
had one of these self-contained oil changers, but I gave it
away to someone when I sold my powerboat and bought a
sailboat with an outboard engine. Of course I'd
regretted giving it away ever since, so after last year's
frustration with the oil sucking thing that I'd been using,
I decided to bite the bullet and buy another real oil
changer. This time, I'm not giving it away no matter
what happens.
The new smaller size Yanmar replacement
oil filter sure is easier to change than the larger
original, which was so tight to the alternator (at least to
my oversized aftermarket alternator) that I couldn't get a
filter wrench on the filter without loosening the alternator
bracket. The new ones, being roughly 1/2" - 3/4"
smaller in diameter (and also shorter) fit in nicely, and
are easy to replace. |
 |
Oil change complete, I ran
the engine again. Again, I had to prime the water
pump--a minor irritation, since it only happens during these
test runs, but nonetheless it was an issue I failed to
understand. In any event, after a few minutes'
running, I shut down, checked the oil again, and added the
requisite bit to make up for the oil filter's capacity.
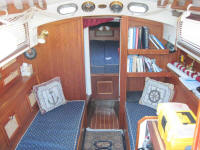
Afterwards, I loaded a lot of the gear back on the boat:
cushions, life vests, towels, etc.--all the stuff that I'd
removed in the fall. As always, it was nice to put the
interior back together again. |
 |
Sunday,
May 16, 2010
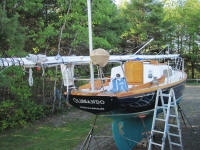
Rigging day. Over a couple
separate sessions or an hour or so each, I reinstalled the
halyards and rigging, and set the mast down on the pulpits
for transport. This completed the major work required
before launching; now all I needed was a launch date, now
tentatively--but far from firmly (an issue at the boatyard
end, not mine)--set for the week of Memorial Day.
Over the next couple weeks, I'd load some basic stores
on board, wash the boat thoroughly, and do whatever else I
felt needed doing, but the boat could go at any time now
and, frankly, I wished I'd just wake up and find her
magically floating on my mooring, rigged and ready to go. |
 |
Tuesday, June 1/Wednesday, June 2, 2010
Launching
probably doesn't technically fall into the "maintenance"
category, but it is the culmination of the spring's
maintenance and preparation efforts, so it seems fitting to
include it here.
In the time following the last
update, I wrapped up the spring maintenance/preparation
chores, including loading some gear and stores on board, and
taking care of the final final preparations required for her
transport, launch, and rigging.
With the unusually
fine weather we'd had all spring, it somehow felt like it
was July already, and I felt very late--though I only
launched two days later than last year. In any event,
the boat went in the water on June 1, and the next day I
delivered her around the 14.6 miles to her mooring in Buck's
Harbor. |
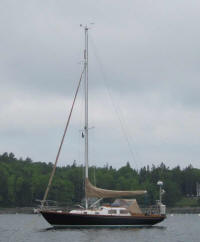 |
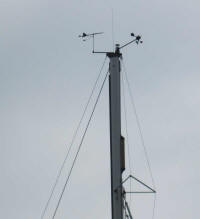
This year, I even managed
to install the masthead wind instruments properly;
last year I'd
mistakenly installed the anemometer upside down. |
 |
Thursday, September 23, 2010
With travel plans for
the end of the month, the end of the sailing season came
early this year. I decided I'd be more relaxed if the
boat was home before we departed for a week's vacation at
the end of September, so on the 18th I brought the boat
around to the boatyard on an absolutely gorgeous early fall
day (typical); after the boatyard hauled the boat and
unstepped the mast, the boat arrived home around mid-day.
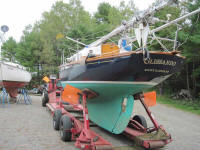
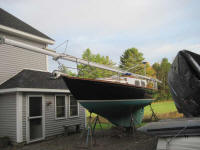
I hired out the transport as I'd decided earlier in the
summer to keep my truck and trailer for yard-use only. |
 |
Saturday, October 9, 2010
After a week's vacation,
then a busy week back at work with the usual catch-up, my
first chance to deal with the boat--still in her
"just-arrived" condition--was now.
The first
order of business was to strip the standing and running
rigging from the mast and get the mast up on its winter
sawhorses on deck. With that out of the way, I removed
all the gear that needed to come off for the winter:
food and drink, clothing, towels, and all the boat gear from
unrigging the boat, such as sails, canvas, and so forth.
You know the drill. Fortunately, the boat had been
relatively minimally loaded (for me) this season, all the
more so since we never went on a cruise, so unloading was
less of a chore than on some years. Still, the sheer
amount of stuff that comes off the boat every season amazes
me.
Afterwards, I drained the water tank, and
winterized the engine, head, and water systems. Once
again, the raw water pump on the engine was reluctant to
draw in water without my first priming the suction hose.
This has happened each time I've run the engine on the hard
for the past couple years. I got it to pump after
priming, but the flow seemed less than usual, so I didn't
run the engine longer than necessary to draw some fresh
water, and then two gallons of antifreeze, through the
system.
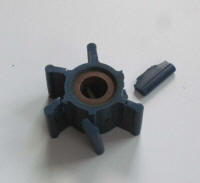
Not surprisingly, when I dismantled the raw
water pump after shutting down for the last time--which I do
each fall--I found that the raw water pimp impeller was
shot. This Globe nitrile impeller, which I installed
new this spring, featured tears in five of the six blades,
and one blade was completely missing. I'd not been
aware of any cooling water issues during the summer--I check
the flow at each use--so perhaps running the pump drier than
it should have been had destroyed the impeller during the
winterization (though the reason I use the nitrile impellers
is that they're supposed to last up to 15 minutes completely
dry).
In any event, the missing blade--plus the poor
condition of the remaining blades--pointed to the reason the
engine, once primed, had not pumped what I thought was a
normal amount of water through the exhaust. I didn't
find the missing blade in the pump or the outlet hose, so I
removed the hose where it connected to the heat exchanger
and found the missing blade there; I was able to extract it
from the small hose nipple with two small screwdrivers.
Perhaps it's time to go back to the normal rubber
impellers. |
 |
Sunday, October 10, 2010
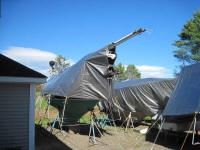
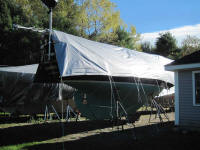
Covered! What else is
there to say; nothing's really changed about how I've done
this since 2001. |
 |
|