|
Cockpit Scuppers
This page was last updated on
2 April 2003.
UPDATE (January 2004)
Complete Scupper Reconfiguration and Replacement. Click here. |
|
After
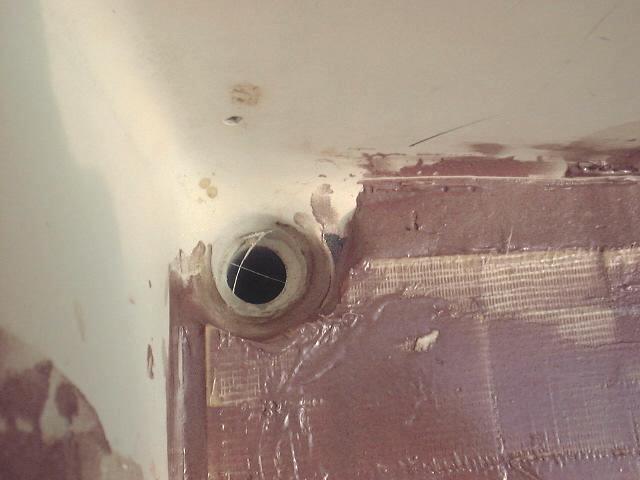
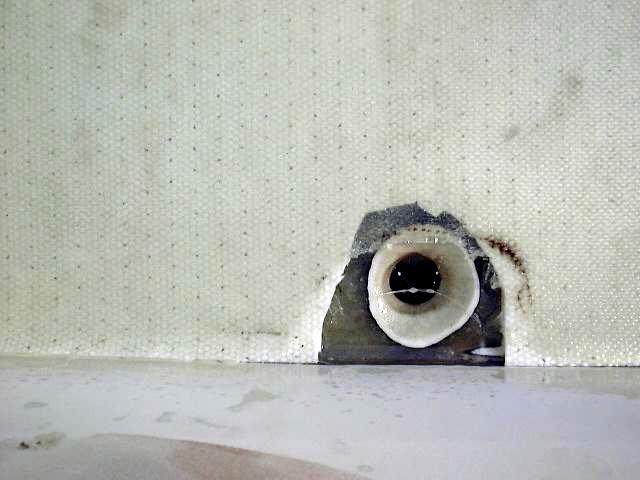
adding core and other material to the cockpit, it was necessary to redo and
refair the scupper openings, both those in the cockpit seats and in the cockpit
well. When installing the fiberglass and new balsa core, I left these
areas open, intending to refair them later.
(Left-cockpit well drain; right-cockpit seat)
|
|
|
 |
|
Refairing
was a multi-step process involving several applications of epoxy fairing
compound. I found that the best tool for the job was my finger, so I dipped my hand in
the pail and went to town with the sticky brown epoxy--it looks like chocolate
frosting, but surely tastes a lot worse! Using my finger, I gooped the
stiff in and around as necessary, attempting to get a decent-shaped hole without
clogging up the drains. I was able to do a decent job in the first coat,
but will have to come back, sand and refair at least once more--and probably
several more times--in order to get a smooth, symmetrical surface. The
process was pretty much the same for the deck scuppers in the seats and the main
cockpit drains in the well, although with the 1/2"
core in the well the opening around the drains was deeper and a little more
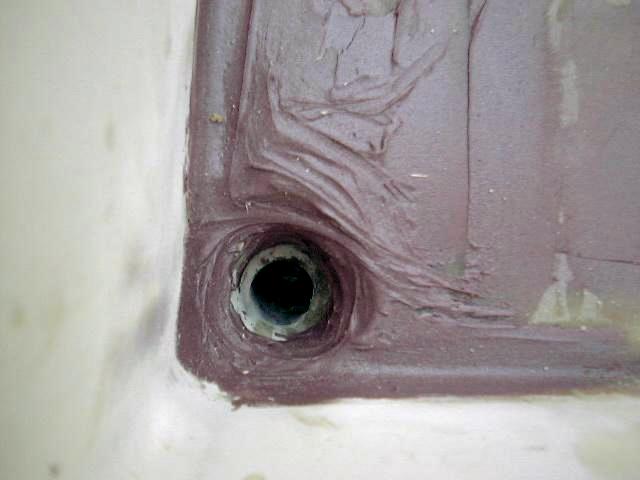
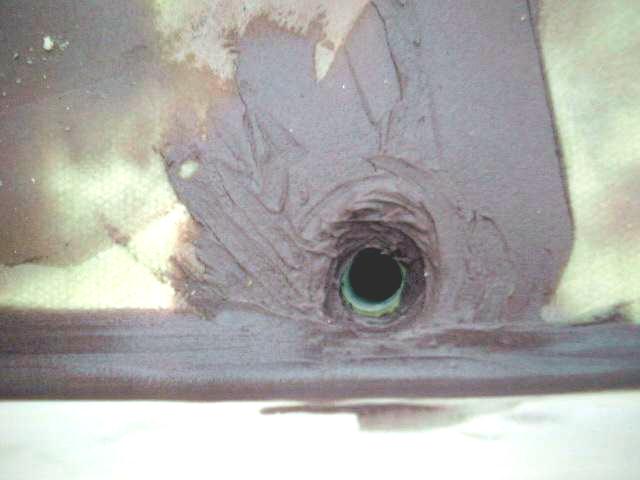
difficult to fair. The two photos below show the scuppers after the initial
application of epoxy--the upper is the cockpit well, the lower is the cockpit
seat (the same drains as shown in the photos above).
|
 |
 |
| After
several more coats, sanding in between coats, I finally achieved a decent,
smooth, fair surface on the scuppers and drains. This was a lot of work,
requiring much hand sanding with little bits of paper, but the overall shape of
the scuppers is important--after all, it's these details that will make the
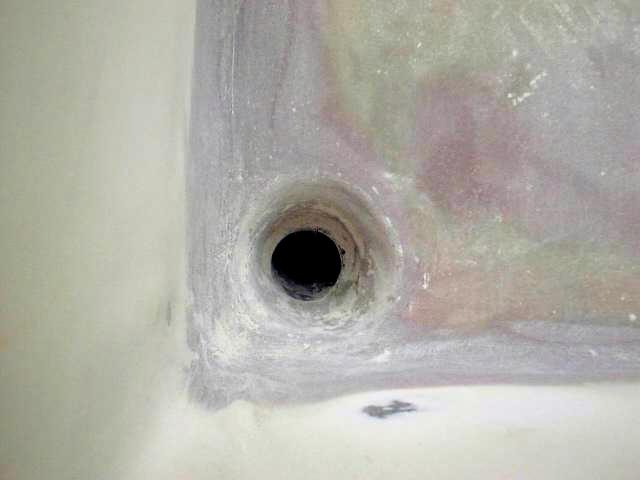
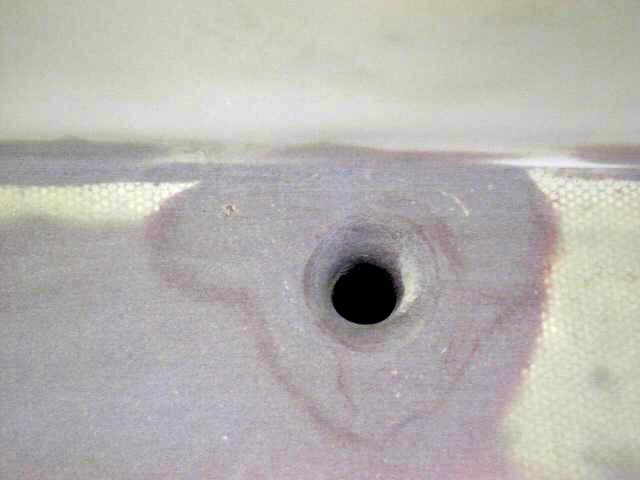
overall project a cosmetic success. The photo to the right shows one of
the drains built into the cockpit seats. The inner part is not perfect,
but doesn't need to be--I'll probably cover all the openings with grates to keep
out debris anyway (at least the two in the cockpit sole) and any minor
imperfections 1/2" down the tube will never be noticeable. Besides,
the one existing, unmodified scupper on the starboard sidedeck (not affected by
the deck work) looks much worse than any of the ones I redid. These
photos (below) shows the same two scuppers after much
fairing and reshaping. I need to do a little more work on these two
scuppers, but, as you can see, they're pretty much there. |
 |
 |
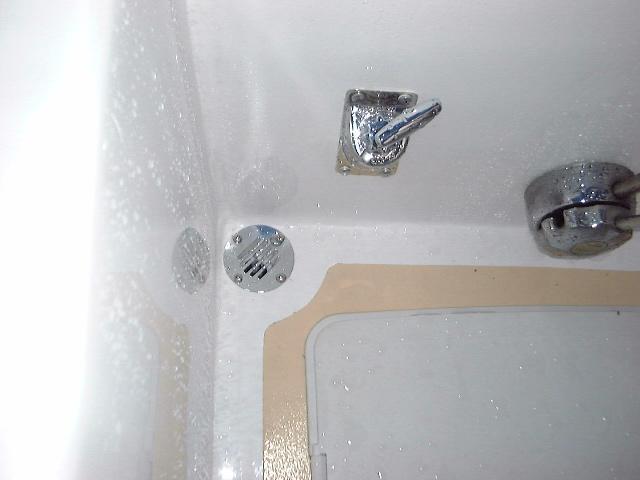
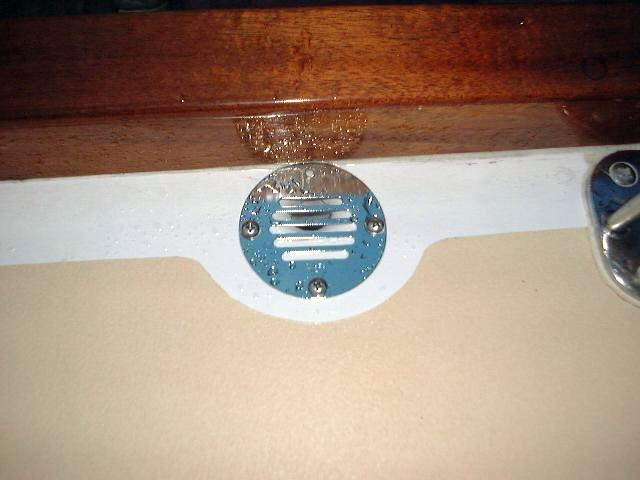
| I completed any final touches on the fairing
in my final paint preparations, when I filled pinholes and minor uneven spots
with a smooth, creamy filler (Interlux epoxy surfacing compound). Later, a
week or so before launching the boat at the end of the project, I installed some
little debris screens made by Perko. They're meant as ventilator screens,
but were the best thing I could find to work on these scupper openings.
They are 2-1/2" in diameter, and I installed them with screws and a bed of
polysulfide to seal the holes. |
 |
 |
|
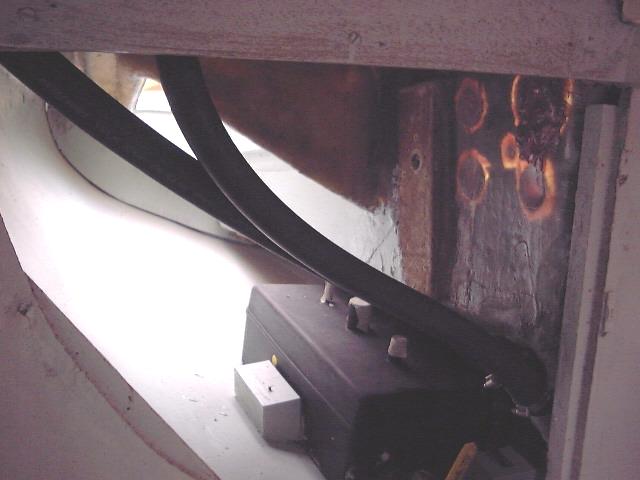 There
are drains in the cockpit seats and on the sidedecks just outside the cockpit,
which connect to additional hoses that in turn connect to the main scupper
drains beneath the cockpit. One of the first "replacement"
projects I completed was installing new hoses on these four drains, as before
long the access to the bottoms of the drain fittings on deck would become much
more difficult. With the galley and icebox removed (and the rest of the
boat entirely stripped out as well), access was as good as it was going to
get. I took this opportunity to install new fabric-reinforced hoses on all
four drains. There
are drains in the cockpit seats and on the sidedecks just outside the cockpit,
which connect to additional hoses that in turn connect to the main scupper
drains beneath the cockpit. One of the first "replacement"
projects I completed was installing new hoses on these four drains, as before
long the access to the bottoms of the drain fittings on deck would become much
more difficult. With the galley and icebox removed (and the rest of the
boat entirely stripped out as well), access was as good as it was going to
get. I took this opportunity to install new fabric-reinforced hoses on all
four drains.
|
|
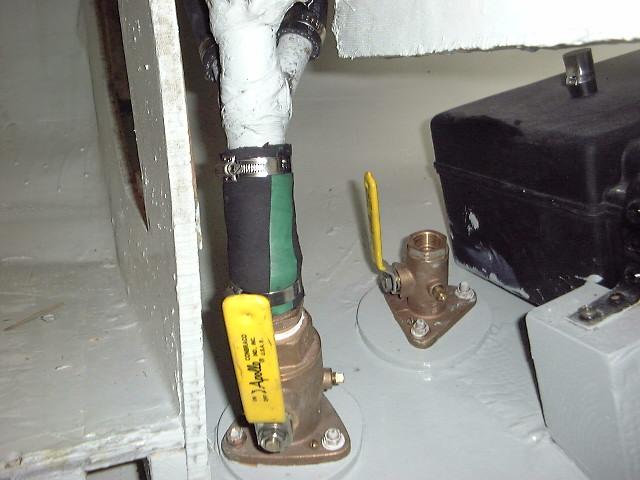 Then,
I replaced the scupper hoses with new fabric-reinforced
water hose for the two pair of deck drains, and wire-reinforced engine exhaust
hose for the main cockpit scuppers. Getting this stiff hose in place in
the very short run available was a trick, but I finally got it onto the new seacocks
and the slightly cut down fiberglass drains from the cockpit above. I
clamped the new hoses in place with high quality, all 316 stainless AWAB clamps. Then,
I replaced the scupper hoses with new fabric-reinforced
water hose for the two pair of deck drains, and wire-reinforced engine exhaust
hose for the main cockpit scuppers. Getting this stiff hose in place in
the very short run available was a trick, but I finally got it onto the new seacocks
and the slightly cut down fiberglass drains from the cockpit above. I
clamped the new hoses in place with high quality, all 316 stainless AWAB clamps.
|
|
When the boat was launched in
2001, I checked the hoses and found that the port hose (which takes the most
contorted turn onto the tailpiece from the scupper) was leaking a bit at the
tailpiece. The immediate solution was to close the seacock, which I
did. However, this meant that I had only one of the two scuppers in
action--fine for the short term, but hardly ideal over the long haul.
In late May 2002, I decided to
tackle the problem. No amount of clamp-tightening would do the trick, so I
guessed that I would have to try another type of hose. Thinking that some
heavy-duty fabric-reinforced hose would be easier to deal with and more
flexible, I ordered some 1-1/2" from Hamilton Marine.
When the hose arrived, I could
immediately tell that it was stiff stiff stiff. Still, I hoped it would do
the job. Out on the boat, I removed the old hose (destroying it in the
process--hoses really grip that ridged section of the tailpiece). Then,
cutting a piece of the new hose to length, I tried to get it into
place. Ha! There was no way this stuff was going to work. It
simply wouldn't bend the way it had to, and when I tried it merely kinked
anyway.
The problem with getting the hose
to fit stems from two issues:
1. The scupper outlet
beneath the cockpit, onto which the hose clamps, is too close to the seacock and
tailpiece beneath
2. The seacock, naturally
being at something of an angle because of the curvature of the hull, faces away
from the scupper outlet at an odd angle, making a transition for the hose
very awkward and, as the earlier try showed, impossible to seal tightly.
My next thought was to create a
way for the hose to make some bends using pipe fittings and such. Heading
to town for some fittings, I assembled a bewildering array of adapters, plastic,
bronze, elbows, and tailpieces that I needed to make the various transitions in
size from the 1-1/4" seacock to the 1-1/2" scupper outlet; the
seacocks use "full flow" tailpieces that allow the use of 1-1/2"
hose with the smaller seacock. At this point, I didn't know that a 90°
full flow tailpiece was available, so I had to come up with a series of size
adapters based on what I could find at the store. I knew it was ridiculous, but
I still hoped the plan might work. Of course, it didn't. I returned
all the dumb fittings.
Then, I discovered that they make
90° full flow tailpieces, so I ordered one, hoping this might make things
easier. Nope--the curve is way too high, and there was not enough
clearance to even thread it into the seacock; it kept hitting the scupper
outlet. Shoot.
|
|
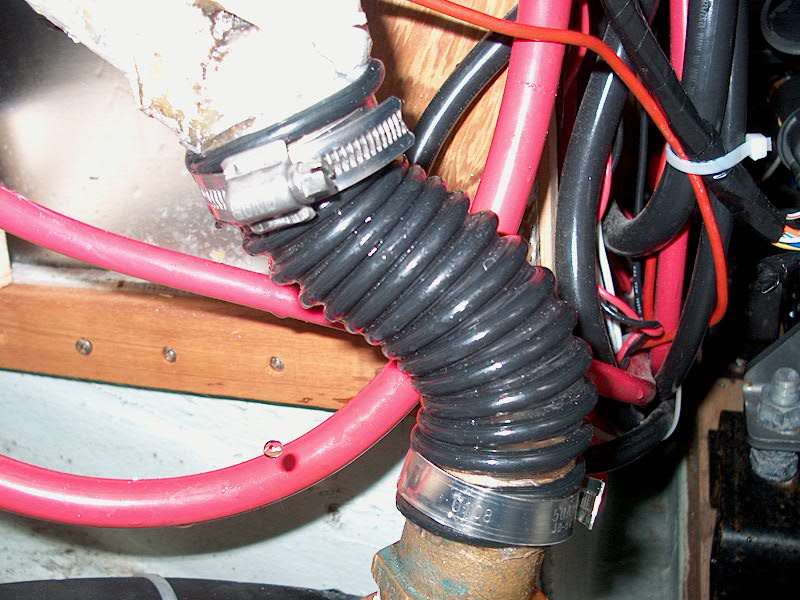 Meantime,
the scuppers--from the cockpit and two sidedeck drains--were free to flow
directly into the bilge, since the hose no longer was connected.
Obviously, I needed a way to stop this. In desperation, I pulled out a
spare length of cheap bilge hose (the clear stuff with black reinforcement that
I used on my bilge pumps and water tank fill--total junk, by the way.
Don't use it for anything; I'll probably replumb the bilge pumps for next
year.) Yes, I know this stuff is not meant for this use. I just
needed something. I was able to get the hose on, but it didn't seal well
at the top end this time. Oh well...good enough for now. I still
leave the seacock closed when I'm not on the boat, but at least I can open it if
it rains hard or I wash the boat down to allow the sidedeck drains and scupper
to work properly. Note the tortured angle the hose has to make--and also
check out the drop of water caught in midair by the battery cable in the
background! Meantime,
the scuppers--from the cockpit and two sidedeck drains--were free to flow
directly into the bilge, since the hose no longer was connected.
Obviously, I needed a way to stop this. In desperation, I pulled out a
spare length of cheap bilge hose (the clear stuff with black reinforcement that
I used on my bilge pumps and water tank fill--total junk, by the way.
Don't use it for anything; I'll probably replumb the bilge pumps for next
year.) Yes, I know this stuff is not meant for this use. I just
needed something. I was able to get the hose on, but it didn't seal well
at the top end this time. Oh well...good enough for now. I still
leave the seacock closed when I'm not on the boat, but at least I can open it if
it rains hard or I wash the boat down to allow the sidedeck drains and scupper
to work properly. Note the tortured angle the hose has to make--and also
check out the drop of water caught in midair by the battery cable in the
background!
I think the only solution may be
to move the seacock farther away from the scupper drain, and then use the 90°
full flow tailpiece to provide a smooth path for the hose. But that will
have to wait till the boat is hauled. The cheap hose allowed me to open
the seacock from time to time during the season, as necessary, when we were on
the boat; mostly, though, it remained closed, as I would never trust this junky
hose and setup when leaving the boat.
The Final
(Temporary) Solution
In spring 2003, I
revisited the port scupper. I didn't want to go in the water
without a better, more permanent solution--one that would actually keep
water out of the boat! The first thing I did was remove the
cheap plastic hose. Then, figuring that--in situations like
this--a longer length of hose is better than a shorter length, I found a
2' length of wire-reinforced exhaust hose (left over from the old galley
sink drain) that seemed about right, and attempted to install it.
First, I clamped one end to the seacock tailpiece, ensuring that I
slipped the hose all the way over the nipple and securely clamped it in
place. With one end secure, I twisted the flexible hose around,
trying various methods, curves and angles to get the top end in place on
the fiberglass scupper tube.
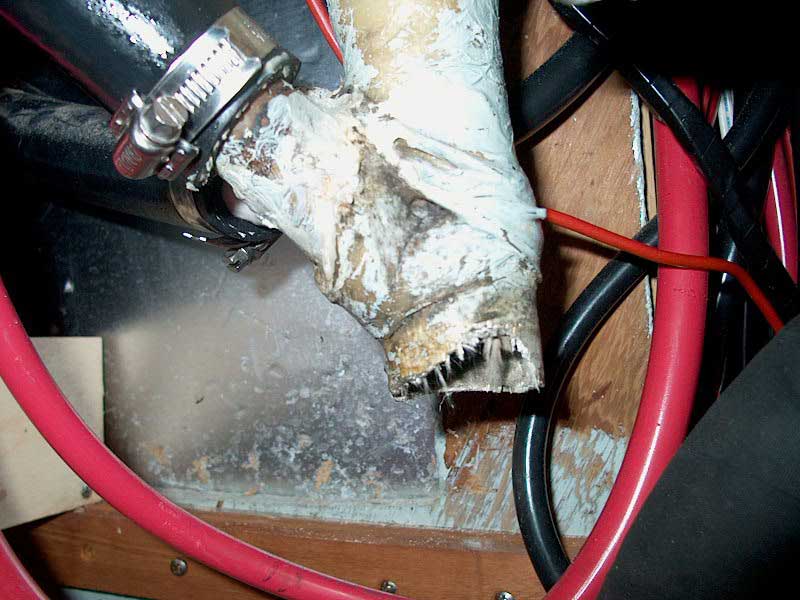 Quickly,
though, it became apparent that what remained of the scupper tube was
not going to be capable of accepting this hose. Not only was the
protruding portion too short to give a proper clamping surface, but the
old, resin-starved fiberglass tube was cracked and damaged, and when I
tugged at the cracked portion, a large chunk came off in my hand--and
with it went my dream of solving this scupper problem on that day, since
there was no way that any hose would be able to clamp to the remains
successfully. I sighed deeply, and regrouped. Quickly,
though, it became apparent that what remained of the scupper tube was
not going to be capable of accepting this hose. Not only was the
protruding portion too short to give a proper clamping surface, but the
old, resin-starved fiberglass tube was cracked and damaged, and when I
tugged at the cracked portion, a large chunk came off in my hand--and
with it went my dream of solving this scupper problem on that day, since
there was no way that any hose would be able to clamp to the remains
successfully. I sighed deeply, and regrouped.
|
|
Because of the design of
the scupper--incorporating two deck drains into a single outlet,
combined with the cockpit drain itself--a simple replacement was not in
order. Not only that, but replacing the drain would involve quite
a bit of glasswork, fairing, filling, and working in a confined
area. Not something that I had any intention in getting involved with at this point in the season. Clearly, a solid, strong,
watertight and trustworthy solution was needed to get me through at
least the upcoming season. Then, perhaps after the season, it will
be time to revamp both cockpit scuppers and make the whole thing right
once and for all.
Temporarily
stumped, I closed things up and left for a day or two, all the while
running ideas through my head. What I came up with was an idea to
epoxy a bronze 90° tailpiece to the fiberglass stump, onto which I
could easily install the scupper hose.
I
rummaged through my spare parts and found a myriad pieces and parts left
over from last year's attempts at scupper reconfiguration. My
initial hope to simply glass a regular tailpiece to the fiberglass tube
was dashed briefly when I realized that the threaded end was too small
to fit over and around--or too large to fit inside--the fiberglass
stump.
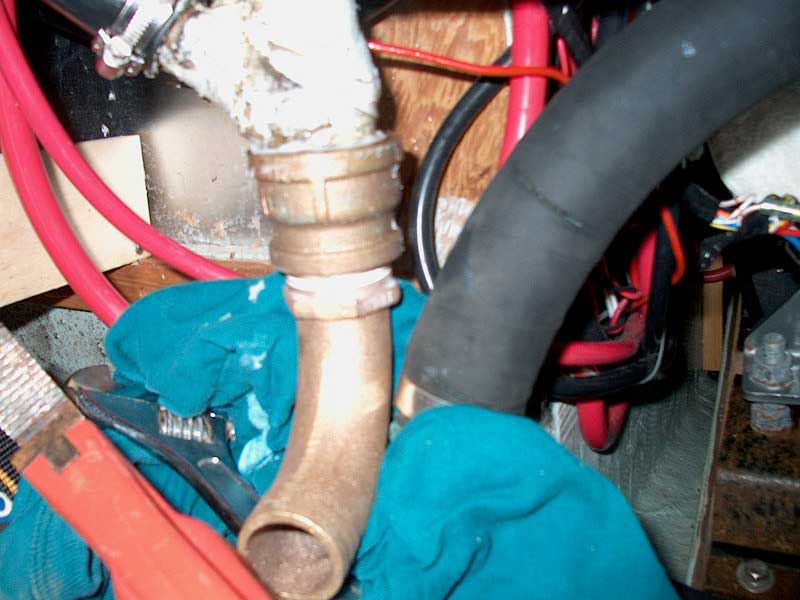
 However,
I soon found the perfect solution in my box of tricks. I happened
to have a 1-1/2" to 1-1/4" female coupler that I had purchased
earlier, and found that the wide end was the perfect size to slip over
the fiberglass stump. With the 90° tailpiece screwed into the
smaller end of the coupler, I could effectively accomplish what I had
set out to. After double-and triple checking the fit, and tightly
threading the tailpiece into the coupler (since there would be no way to
screw it in once the coupler was epoxied in, because of tight clearances
with the seacock immediately next door), I mixed a batch of epoxy
thickened with adhesive silica, cleaned all the mating surfaces, and
glued the bronze pieces in place, carefully ensuring that any and all
gaps around the coupler and the fiberglass tube were filled with solid
epoxy. I wedged the pieces in place with a couple wrenches to hold
them, and let the epoxy cure for a couple days. In the photo
below, the black hose to the right is the new scupper hose, clamped to
the seacock that is hidden behind the green rag. However,
I soon found the perfect solution in my box of tricks. I happened
to have a 1-1/2" to 1-1/4" female coupler that I had purchased
earlier, and found that the wide end was the perfect size to slip over
the fiberglass stump. With the 90° tailpiece screwed into the
smaller end of the coupler, I could effectively accomplish what I had
set out to. After double-and triple checking the fit, and tightly
threading the tailpiece into the coupler (since there would be no way to
screw it in once the coupler was epoxied in, because of tight clearances
with the seacock immediately next door), I mixed a batch of epoxy
thickened with adhesive silica, cleaned all the mating surfaces, and
glued the bronze pieces in place, carefully ensuring that any and all
gaps around the coupler and the fiberglass tube were filled with solid
epoxy. I wedged the pieces in place with a couple wrenches to hold
them, and let the epoxy cure for a couple days. In the photo
below, the black hose to the right is the new scupper hose, clamped to
the seacock that is hidden behind the green rag. |
|
|
|
When the epoxy was cured,
I twisted the hose around and clamped it securely in place on the new
tailpiece. The hose runs straight up from the seacock, then curves
down and sideways to join the new elbow beneath the scupper. I
guess it's sort of like having a P-trap on the scupper--the operation
principal should be the same. I need to install some chafe gear on
the hose where it rubs against a fiberglass cockpit stiffener, as seen
in the center photo.
|
|


 |
| The bodged-together port scupper arrangement worked
adequately during the 2003 sailing season, though I never trusted it enough to leave the seacock open when I wasn't on
board. While the "repair" was enough to get through a season, it was obvious that no longer could I put off
the ultimate reconfiguration of the scuppers.
In early 2004, warm inside the boat shop, I began the much-needed scupper replacement
project.
Click here to continue.>
|
|